
Traeger Maintenance Schedule: The Complete Checklist for Every Owner
A Traeger maintenance schedule is the difference between a pellet grill that runs perfectly for 10+ years and one that starts having temperature problems, ignition failures, and grease fires after a single season. Traeger® grills are well-built machines, but they have moving parts, electrical components, and cooking surfaces that all need periodic attention.
The problem most grill owners face is not willingness to maintain their grill — it is knowing what to do and when to do it. This guide gives you a complete, organized maintenance checklist broken down by frequency: after every cook, every 5 cooks, every 20+ cooks, and seasonally. Print it, bookmark it, and refer to it regularly. Your grill — and your food — will thank you.
After Every Cook
These tasks take less than 5 minutes combined and should become automatic. Treat them like brushing your teeth after a meal — non-negotiable.
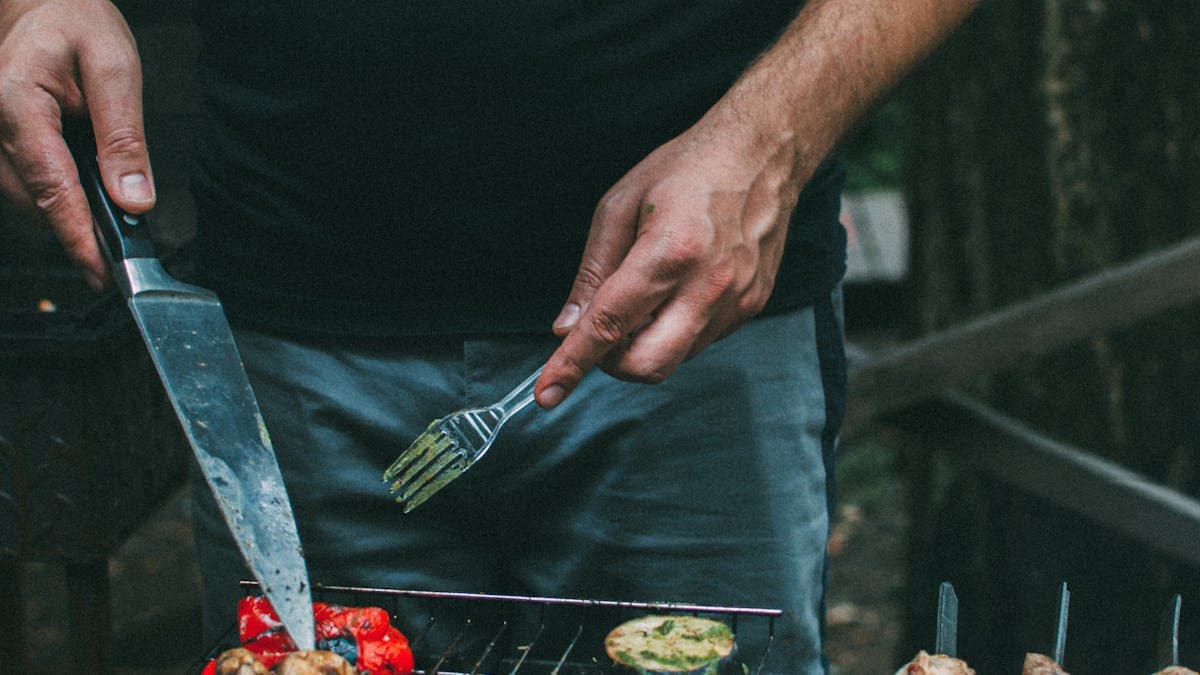
Brush the Grill Grates
While the grill is still warm (not hot), use a Traeger grill brush to scrub the grates clean. Food residue hardens as the grill cools, making it significantly harder to remove the next time you cook. A quick 60-second brushing while the grates are warm prevents buildup from compounding over multiple cooks.
Use a nylon bristle brush for porcelain-coated grates and a brass or nylon brush for stainless steel grates. Avoid wire bristles — they can shed into food.
Check the Drip Tray and Grease Bucket
Glance at the drip tray to see how much grease has accumulated. If you are using Traeger drip tray liners (and you should be), check whether the liner needs replacing. High-fat cooks like pork belly, ribs, or chicken thighs produce significantly more grease than leaner cooks like vegetables or fish.
Pull the grease bucket and check the level. Empty it if it is more than half full. A grease bucket overflow is messy, attracts pests, and can drip onto your patio surface. It takes 30 seconds to empty — do not skip it.
Run the Shutdown Cycle Completely
This is maintenance you do by not doing anything — simply let the grill complete its full shutdown cycle after every cook. The fan continues running for 10-15 minutes after you power down, burning off residual pellets in the fire pot and cooling the system. Never unplug the grill early. Cutting the shutdown cycle short leaves unburned pellets in the fire pot, which absorb moisture, swell, and can jam the system on your next startup.
Every 5 Cooks
These tasks address components that do not need attention after every single cook but should not go more than a handful of sessions without maintenance.
Vacuum the Fire Pot
This is the single most impactful maintenance task you can perform. Remove the grill grates, drip tray, and heat baffle to expose the fire pot. Use a shop vacuum to remove all ash from the fire pot and the bottom of the grill barrel.
Ash accumulation in the fire pot restricts airflow around the igniter rod. Restricted airflow causes:
- Failed ignition (the grill tries to light but pellets do not catch)
- Temperature swings (the fire cannot burn consistently)
- Excessive smoke (incomplete combustion produces thick, bitter smoke)
If you cook frequently — 3-4 times per week — vacuum the fire pot every 3 cooks instead of every 5.
Replace the Drip Tray Liner
Even if the liner does not look saturated, replace it every 5 cooks as a preventive measure. Grease on a liner can go rancid over time, especially in warm weather, and rancid grease affects the flavor of your food. Fresh drip tray liners are inexpensive insurance against both off-flavors and grease fires.
Inspect the Pellet Hopper
Open the hopper and look at the pellets inside. Check for:
- Moisture damage: Pellets that have absorbed moisture swell, crumble, and turn to sawdust. If you see crumbled pellets or dust at the bottom of the hopper, empty the hopper completely and start with fresh pellets.
- Clumping: Pellets sticking together indicate humidity exposure. Remove clumped pellets and check your grill cover for proper protection.
- Insects or debris: In warmer months, the hopper can attract bugs. A clean hopper with fresh pellets prevents this.
Every 20-25 Cooks (Deep Clean)
This is your comprehensive maintenance session. Block out 45-60 minutes and address every component.
Full Interior Deep Clean
Remove all internal components (grates, drip tray, heat baffle) and perform a thorough cleaning:
- Vacuum all ash and debris from the entire interior
- Scrape the interior walls and lid with a plastic putty knife to remove carbonized grease
- Vacuum again after scraping
- Wipe surfaces with a damp cloth
For detailed step-by-step deep cleaning instructions, see our how to clean a Traeger grill guide.
Clean or Replace the Drip Tray
Remove the drip tray liner and inspect the tray itself. Even with liners, some grease seeps around the edges over time. Scrape the tray with a plastic scraper, wash with warm soapy water, and dry thoroughly. If the tray shows significant corrosion or has developed holes, replace it. A corroded drip tray allows grease to drip directly onto the heat baffle and fire pot — a fire hazard.
Deep Clean the Grill Grates
Soak grates in warm soapy water for 20 minutes, then scrub with a grill brush. For stubborn, baked-on residue, use a food-safe degreaser. Rinse completely, dry, and lightly oil with a high-smoke-point oil (canola or avocado).
Clean the Chimney and Chimney Cap
Remove the chimney cap and inspect the chimney pipe. Use a long brush or rolled paper towels to clean out grease and creosote buildup. The chimney is your grill's exhaust — a blocked chimney restricts airflow, causes excessive smoke, and can create pressure buildup inside the grill barrel. Replace the cap and ensure it moves freely.
Inspect Gaskets and Seals
Check the lid gasket (the felt or silicone seal around the edge of the lid) for gaps, compression, or wear. A damaged gasket allows heat and smoke to escape, making your grill less efficient and harder to control at low temperatures. Replacement gaskets are available from Traeger and are easy to install yourself.
Also check the seal around the hopper lid. A loose hopper seal allows moisture in, which damages your pellets.
Inspect the Hot Rod Igniter
Look at the igniter rod inside the fire pot. It should be intact with no visible cracks or heavy corrosion. The hot rod is a consumable part that typically lasts 1-3 years depending on usage. If your grill has been struggling to ignite or takes longer than 5 minutes to start producing smoke, the igniter may need replacement.
Check the Auger
With the fire pot cleaned out, visually inspect the auger opening. Look for jammed pellets, sawdust buildup, or any signs of corrosion. If the auger has been making unusual grinding noises, this is where you will find the cause. Clear any obstructions and run the grill briefly to confirm smooth pellet feeding.
Seasonal Maintenance
Start of Grilling Season (Spring)
Before your first cook of the season:
- Remove the grill cover and inspect the exterior for rust, paint damage, or pest intrusion (mice love to nest in grill barrels over winter)
- Open the hopper and discard any pellets left from last season — they have likely absorbed moisture
- Perform a full deep clean (see the 20-25 cook checklist above)
- Fill the hopper with fresh pellets
- Run the grill at 350°F for 15-20 minutes as a test cycle to confirm all systems work
- Check the power cord for rodent damage
- Update the grill firmware if your model has WiFi connectivity (Traeger releases updates periodically)
End of Grilling Season (Fall/Winter)
If you plan to store your grill during cold months:
- Perform a full deep clean
- Empty the hopper completely — pellets absorb moisture over months of storage and will cause auger jams
- Run the grill through one more cycle to burn off any remaining pellets in the auger tube
- Lightly oil the grill grates and interior metal surfaces to prevent rust during storage
- Cover the grill with a fitted Traeger grill cover
- Store in a covered area if possible (garage, carport, covered patio)
- If storing outdoors, ensure the cover is secure and waterproof
Tip for year-round grillers: If you cook through winter, you do not need to winterize. However, expect higher pellet consumption in cold weather (the grill works harder to maintain temperature) and check the hopper more frequently for moisture issues. An insulated blanket (available from Traeger) can help with efficiency in temperatures below 35°F.
Supplies Checklist
Keep these on hand so maintenance is never delayed by a missing supply:
| Supply | Purpose | Frequency |
|---|---|---|
| Traeger Grill Brush | Grate cleaning | Every cook |
| Traeger Drip Tray Liners | Grease management | Every 2-5 cooks |
| Shop vacuum | Ash removal | Every 3-5 cooks |
| Traeger Grill Cover | Weather protection | Always on when not in use |
| High-smoke-point oil | Grate seasoning | After deep cleans |
| Plastic scraper | Grease removal | Deep cleans |
| Replacement gasket | Lid seal | As needed (check every deep clean) |
| Traeger Signature Blend Pellets | Fuel | Keep hopper stocked |
How Maintenance Extends Your Grill's Life
A well-maintained Traeger can last 10-15 years or more. A neglected one may start showing serious issues within 2-3 years. Here is what regular maintenance protects:
- Fire pot longevity: Ash is corrosive. Regular vacuuming prevents the fire pot from corroding through, which is a repair that often costs more than the part is worth.
- Auger motor health: Moisture-damaged pellets swell and jam the auger, forcing the motor to work harder. Over time, this burns out the motor. Keeping dry, fresh pellets in the hopper is the simplest way to protect a component that costs $50-80 to replace.
- Temperature accuracy: A clean fire pot and unobstructed chimney give the temperature controller accurate feedback. Your grill holds temperature better, which means more consistent cooking results.
- Food safety and flavor: Clean grates and drip trays eliminate the risk of rancid grease contamination and prevent bitter, off-flavored smoke from tainting your food.
Frequently Asked Questions
How do I know if my Traeger fire pot needs cleaning?
The clearest signs are temperature fluctuation (more than 20°F swings from your set temperature), difficulty igniting (the grill runs the startup cycle but pellets do not catch), or excessive thick white smoke during normal cooking. All three of these symptoms point to ash restricting airflow in the fire pot. Vacuum it out and the problems should resolve immediately.
Can I use my Traeger in the rain?
You can cook in light rain, but avoid heavy downpours. Moisture can enter the hopper through gaps around the lid, saturating your pellets and causing jams. After cooking in rain, open the hopper and check the pellets for moisture damage. When not in use, always cover your grill with a fitted cover. Never leave the hopper exposed to rain.
How often should I replace Traeger grill grates?
Grill grates last 3-7 years depending on material, care, and usage. Porcelain-coated grates should be replaced when the coating is chipped or peeling extensively. Stainless steel grates last longer but can eventually thin from repeated scrubbing. Inspect grates during every deep clean — if you see significant rust, warping, or structural weakness, it is time for a replacement.
What maintenance does the Traeger WiFIRE controller need?
The WiFIRE controller itself requires minimal maintenance. Keep the display clean with a damp cloth (not dripping wet). Protect it from direct rain exposure. The most important thing is to keep the RTD temperature probe (inside the grill barrel) clean — wipe it with a damp cloth during deep cleans. A dirty probe gives false temperature readings, making the controller compensate incorrectly.
Is there a printable version of this maintenance schedule?
You can print this page directly from your browser for a handy reference to keep near your grill. Use your browser's print function (Ctrl+P or Cmd+P) and select "Save as PDF" for a digital copy you can access from your phone while you are out at the grill.
Protect Your Investment
A quality grill cover is the easiest maintenance step you can take. It protects against rain, UV damage, dust, and pests — keeping your Traeger ready to cook whenever you are.
Shop Traeger Grill CoversRelated Guides
Complete your Traeger maintenance knowledge with these companion guides:
- How to Clean a Traeger Grill — Detailed step-by-step instructions for routine and deep cleaning.
- Best Degreaser for Pellet Grills — Food-safe cleaners that cut baked-on grease from grates, drip trays, and interiors.
- How to Season a New Traeger — The proper burn-in process for a brand-new grill.
- Traeger Smoked Pork Belly — After maintenance day, reward yourself with this incredible recipe.
Explore more: Complete Smoking Guide | How to Clean a Traeger Grill | How to Season a New Traeger | All Guides